Thisis a fairly simple method for simulating bullet holes in a painted metal surface. It requires no more than three layers, and makes heavy use of the layer style (fx) tools. In this way, making changes to lighting, shading and coloris quite simple. I actually highly recommend using these tools for many projects because of the ease in making non-destructive (and easily reversible) changes.
Okay, let's begin:
For the first layer, all you need is a simple fill. In this case, green. For your reference as far as all the layer style settings are concerned, the images I'll be using in this demonstration are originally from a 300dpi, 1800x1800 pixels (6"x6") image.
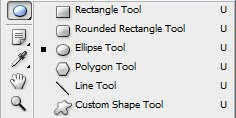
For the second step, we'll create the hole. Using the Ellipse Tool, (holding Shift to maintain a regular circle) drag to make your bullet hole to the desired size. Make sure, of course, to set the fill on your circle to black.
This will be the basis for your bullet hole, so if you are using it for a specific layout, be sure to account for the proper scale in your design.
Next we are going to create the indentation that bullet holes often leave in metal surfaces. Select your "hole" layer, and either double-click the layer, or click the "fx" icon at the bottom of the Layers window to bring up the Layer Style dialogue box, and click "Bevel and Emboss" and apply the settings shown. This should result in the appearance of a shaded depression around your bullet hole. Make sure that the Style is set to "Outer Bevel," Technique is set to "Smooth" and the Direction is set to "Down." These are the most important settings for the proper effect. You may experiment with Size, Depth, Angle, etc. to your own taste. You'd be surprised what new tricks you can find out by accident just by messing around and experimenting with settings!
Okay, now we have a pretty nice-looking hole punched in our imaginary surface. You aren't going to stop
there are you? Oh, no. we are just getting started. Next, create a new layer, below (yes,
below) the "hole" layer. Using either the Lasso Tool or Polygon Lasso (L) create an irregular, jagged shape around the circle/ indent, and Fill the area.
I recommend a medium gray color for a steel color. Use either the Bucket Tool (K) or Edit>Fill Layer... OR Alt+Backspace. My personal favorite however, is the Layer Style (or "fx") "Color Overlay." With this tool, you can always go back and tweak your color without any hassle.
This irregular shape represents where the paint on the metal has chipped off around the hole upon impact. This looks pretty good, but there is still more that can be done yet to make this look that extra bit more convincing. So make sure your gray chip layer is selected, because we're going back to visit an old friend.
Open the Layer Style/fx window for this layer, and once again click "Bevel and Emboss," though this time the settings are going to be a bit different, since the effect we are going for is a bit more subtle. Use the settings shown. This time, setting the Direction is still set to "Down" and the Size is set very low (in this case to "8px," as we are depicting the edge of a very thin layer of material. Notice that the Depth is set very high (286%.) This increases the contrast, helping make it more visible in this case, but not necessary. The "Technique" setting and be set to any mode, depending on your tastes.
Now it look pretty good, though a bit sterile. Which is okay, if you want that kind of thing. Our bullet hole needs a little bit of dirt... or the approximation of something dirty. And we can do it without resorting to any innuendos.
With the metal chip layer still selected, reopen the Layer Style/fx window (assuming it isn't
still open, ya lazy bums.) This time, click on "Inner Glow." Strangely, I almost
never use it for anything resembling a glow. So we are going to change a few of the settings to suit our purposes for this project.
In this case, I used the settings shown here. We are going to change the Blend Mode to "Multiply" and the Color to black. We want a fairly subtle effect, so keep the Choke at zero, and the Opacity down a bit. Move the "Size" slider until you get the amount of sootiness you want. Don't go overboard, or you'll overpower the shading on the indentation.
So that about does it for the hole effect. While our subject complete, we shall turn our attention to the background. It
is a bit plain, compared to all the shading we've just added our bullet hole. So for a finishing touch, we'll visit the Layer Style arsenal once more. So now, select the Background Layer (Psst! The green one!) and open the fx window once more. This time, Select "Gradient Overlay."
Holy crap! what did you do? Don't panic if your nice green (or whatever color you chose) is suddenly a dull blend of gray. We'll fix that now.
Change the Blend Mode to "Multiply," and the background color will show up again. Unfortunately, the default gradient levels still leave the background a little dark. So click the "Gradient" bar to bring up the Gradient Editor.Click on the color tab on the right and pick a medium gray. Then Click on the leftmost color tab and change it to white. Click "OK" and you should now have a background with a little ambiance...
If you want to take it a bit further, you can do several bullet holes, on bigger areas. Experiment with some of the settings, colors, etc. Add your own touch and see what you can come up with.
Hopefully this has been useful, and that you can take some useful ideas from it. Feel free to give your input and comments. If you have any questions, or if there are any other topics you'd like to see me cover. Feel free to post your requests.
Until next time!
 For the second step, we'll create the hole. Using the Ellipse Tool, (holding Shift to maintain a regular circle) drag to make your bullet hole to the desired size. Make sure, of course, to set the fill on your circle to black.


